
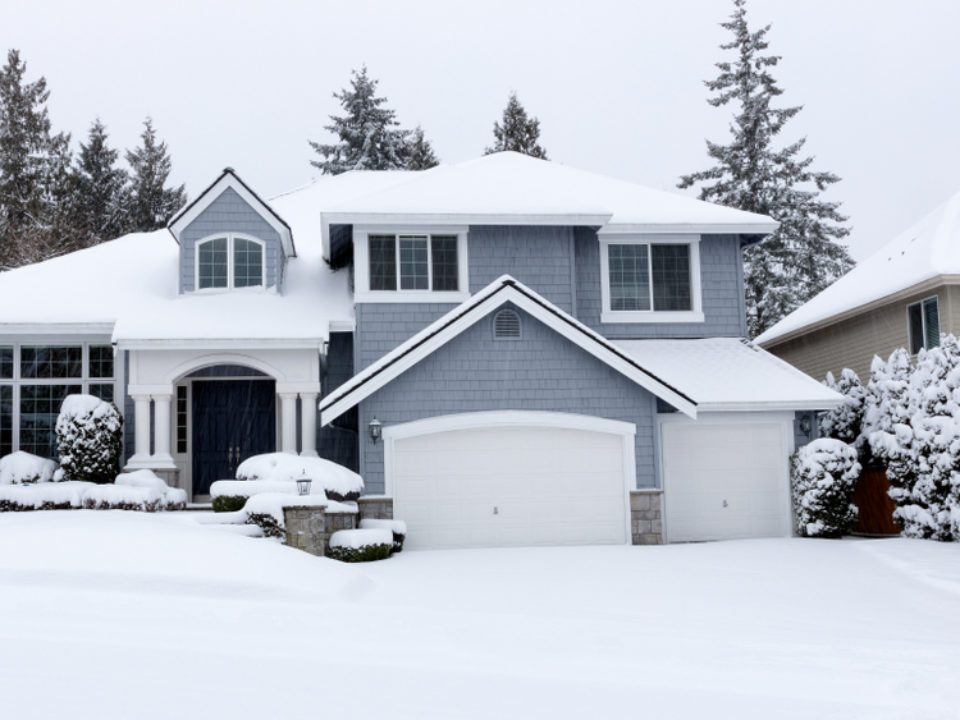
Can You Paint Exterior House in Winter? Tips & Techniques
June 19, 2023
Deciding Whether to Paint Your House Flat or Satin: A Guide
July 24, 2023
What if it rains after I paint my house? This question often troubles homeowners and painting companies alike. Rain can significantly affect exterior house painting, potentially ruining a perfectly good paint job. In this article, we’ll look at the precautions you should take to shield your home’s exterior from wet weather conditions after painting.
We’ll delve into the importance of preparing your home for rain after painting, including applying protective coatings and covering exposed areas. We’ll also discuss how high humidity and dew points can impact the drying process of both oil-based paints and those that comprise solvent-based additives.
Moreover, what if it’s raining while you’re in the middle of a paint job? Should you stop painting immediately or wait till the weather clears? We’ll provide insights on these crucial aspects as well. Additionally, learn about cleaning up after painting inside during heavy rains, inspecting for damage caused by rainwater infiltration, and repairing any damaged areas.
Table of Contents:
- Preparing Your Home for Rain After Painting
- Applying a Protective Coating
- Cleaning Up After Painting
- Covering Exposed Areas
- Sealing the Paint Job
- Inspecting for Damage
- Repairing Damaged Areas
- FAQs in Relation to What if it Rains After I Paint My House
- Conclusion
1. Preparing Your Home for Rain After Painting
Timing is key when it comes to painting your abode. But what if Mother Nature decides to rain on your freshly painted parade? Don’t fret. With proper preparation, you can protect your paint job from unexpected showers.
First things first, inspect your home’s exterior surfaces for any signs of trouble. Look out for peeling or flaking paint, wood rot, mold growth, or water stains that could ruin your masterpiece. And hey, if you need tips on prepping walls before painting, we’ve got you covered.
Once you’ve given your surfaces the once-over, it’s time to clean them up. Break out the power washer or grab a scrub brush and soapy water to banish dirt and grime. Trust us, a clean canvas makes for better paint adhesion.
- Caulking: Seal those sneaky gaps around windows, doors, and trim with some top-notch outdoor caulk.
- Sanding: Smooth out any rough spots on wooden surfaces, so they’re ready to rock that fresh coat of paint.
- Patching: Fill in any holes or cracks with patching compound, then sand ’em down until they’re as flat as a pancake.
Follow these steps, and you’ll have a surface that’s primed and ready for action. Apply a coat of primer, followed by your chosen topcoat(s), to bring your vision to life. At Matt The Painter, we’re here to make your dreams a reality.
One last thing: keep an eye on the weather forecast before scheduling your exterior painting extravaganza. If rain is even thinking about crashing the party within 24 hours of completion, reschedule. Remember, patience is the key to a long-lasting and durable paint job.
2. Applying a Protective Coating
After painting your house, don’t forget the superhero cape – a protective coating. It’s like armor for your freshly painted surfaces, shielding them from rain and other sneaky villains. Even the best exterior paints need backup against moisture and potential peeling.
Choosing the right protective coating depends on your home’s material and weather exposure. A popular choice for protection against moisture and potential peeling are clear sealers, varnishes, or polyurethane coatings. They create a barrier that keeps moisture out, preventing paint from blistering or peeling.
To ensure top-notch results:
- Pick the cream of the crop: Go for high-quality products that offer superior protection and longevity. Go for the best – don’t accept anything less than excellent.
- Call in the pros: If you’re not a DIY enthusiast or want guaranteed results, hire professional painters like us at Matt The Painter. We’re experts in applying these finishes.
- Weather watch: Check the forecast and choose a dry period for coating application. Most coatings need 24-48 hours without rain to cure properly.
These coatings aren’t just rain repellents; they’re also shielders against UV rays and temperature changes. They’re like sunscreen and a cozy sweater for your paint job, keeping colors vibrant over time. Remember, DIY may save money upfront but can mean more maintenance later. So, think long-term before deciding on your protective coating plan.
3. Cleaning Up After Painting
To ensure your fresh paint is safeguarded from rain damage, don’t delay in starting the cleanup process once you’re done painting. Wet paint spills can turn into ugly stains, so don’t leave them hanging.
Start the cleanup right after you finish painting. Here’s what you need to do:
- Peel off the painter’s tape: Be gentle, don’t take off any paint with it.
- Tackle paint spills: If you have any accidents, wipe them up with a damp cloth or sponge before they dry.
- Dispose of used materials properly: Clean your brushes, rollers, and tools thoroughly. Seal up leftover paint cans and follow local regulations for disposal.
For a hassle-free cleanup, consider hiring professionals like Matt The Painter. They know how to handle post-painting messes without ruining your fresh paint job.
Remember, latex-based paints dry in about an hour or two, but oil-based paints can take up to 24 hours. If rain is in the forecast during this drying time, you might need to take extra precautions like covering exposed areas. Let’s discuss further strategies in the following section.
4. Covering Exposed Areas
When painting your home, protect exposed areas from rain damage with plastic sheeting or tarps. No soggy surprises.
Shield outdoor furniture and other items with durable plastic sheets. Keep paint splatters and rainfall at bay. No need for a wet and wild makeover.
Don’t forget to cover windows, doors, and light fixtures too. They deserve some TLC during the painting process. No paint party for them.
- Tarps: Great for patios and driveways. Waterproof and ready to tackle paint spills and unexpected showers. No rain, no pain.
- Plastic Sheeting: Ideal for delicate items and smaller surfaces. Lightweight yet sturdy. No drips, no slips.
These covers also prevent rainwater from ruining your freshly painted walls. No water spots, streaks, or premature peeling. Phew.
If heavy rains are on the horizon, consider using canvas drop cloths. They offer superior protection without suffocating your walls. No moldy surprises.
5. Sealing the Paint Job
If you’ve recently painted your house, sealing the paint job is a must-do to protect it from rain and other environmental factors. Think of it as giving your home an extra shield against moisture, dust, dirt, and those pesky UV rays.
Type of Sealants:
- Acrylic: These sealants are like the superheroes of adhesion and weather resistance. They’re the go-to choice for many.
- Silicone: If you want a sealant that can handle extreme temperatures, silicone is your buddy. It’s like the Chuck Norris of sealants.
- Polyurethane: This sealant is known for its durability and flexibility. It’s like the yoga master of sealants.
Application:
Applying a sealant is just like painting but with a purpose. Grab a brush or roller and make sure to cover every corner and crevice.
Drying Time:
Patience is key here. Allow 24 to 48 hours for the sealant to set before expecting rain protection and color preservation. So, hold your horses before the rain comes pouring down.
Sealing your paint job not only protects it from rain but also keeps the colors vibrant, even under the scorching sun.
If you’re not up for the task or short on time, leave it to the professionals like us at Matt The Painter. We’ll handle everything from prep to clean-up, so you can sit back and enjoy the exceptional results.
6. Inspecting for Damage
After a fresh coat of paint, your house will look stunning. But beware. Rain can cause issues like bubbling, peeling, or cracking in the new paint job.
Water damage can ruin the aesthetics and compromise your home’s exterior walls. So, inspect regularly, especially after rainfall.
Signs to Look Out For
- Bubbling: Bubbles mean water has seeped beneath the paint, causing it to lift and form bubbles.
- Peeling: Moisture can make the paint lose adhesion and peel off.
- Cracking: Too much moisture during painting or exposure to harsh weather can lead to cracks.
If these signs are spotted, prompt action should be taken. Early detection and intervention can save you from costly repairs.
Tips for Inspection
- Pick a day with good lighting to spot even minor damages easily.
- Touch different areas on your wall lightly to detect hidden damage.
- Hire professionals like us at Matt The Painter to identify potential problem areas.
You could also consider using technology like thermal imaging cameras, such as the FLIR C5 Thermal Camera, to detect dampness and temperature differences on walls. These tools are handy for checking larger buildings or commercial spaces.
7. Repairing Damaged Areas
If it precipitates and your paint gets mussed up, don’t panic. Fixing it ASAP is key to keeping your home looking fabulous. At Matt The Painter, we’re all about maintaining our top-notch work.
To start, find the problem areas. Look for bubbles, peeling, or cracks in the paint – signs that water has invaded your fresh coat.
Once the issue has been identified, act quickly. Scrape off loose paint with a putty knife or wire brush, but be gentle – don’t go crazy and ruin the surface.
Next, prime those exposed spots with a high-quality primer, like this one from Home Depot. It seals out moisture and gives your new paint a solid foundation.
- Sanding: After the primer dries (usually 24 hours), smooth out rough edges with fine-grit sandpaper.
- Patching: For bigger holes or cracks, use a patching compound, like this one from Lowe’s.
- Last Coat: Once everything is dry (another 24 hours), apply another coat of your chosen exterior paint color, making sure it’s even all over.
Even if you’re prepared, unexpected weather can mess things up. But remember: quick action now saves you from major repairs later. If you’re unsure about DIY repairs, reach out to us at Matt The Painter. We’re always here to offer professional advice and services.
FAQs in Relation to What if it Rains After I Paint My House
What happens if it rains the day after painting?
Rain can damage a fresh paint job if it hasn’t had enough time to dry, resulting in streaks, water spots, or even washing away uncured paint.
How long does house paint need to dry before rain?
Generally, latex-based paints require about four hours to dry before rain exposure, while oil-based paints need around 24 hours.
Will rain ruin a fresh paint job?
If exposed too soon after application, yes; however, proper preparation and timing can prevent potential damage from rainfall.
What happens if you paint before rain?
If you apply exterior house paint right before heavy rainfall occurs, it could result in poor adhesion and blisters on your home’s surface.
Conclusion
If it rains after you paint your house, don’t panic! Just follow these steps to protect your fresh paint job: apply a protective coating, clean up debris, cover exposed areas with tarps or plastic sheeting, and inspect for damage after the rain.
By taking these precautions, you’ll keep your newly painted house looking fabulous for years to come. Remember, a little rain can’t dampen your home’s beauty!