
Optimal Timing for Wall Repainting: A Complete Guide
April 3, 2024
Do I Need Planning Permission to Paint My House?
March 26, 2026
Hey there!
I’ve heard many of you wondering if it’s a good idea to start an indoor painting project when the snow is piling up outside.
Well, trust me, it’s doable.
Wrapping up in a cozy sweater and transforming a room with a fresh coat of paint can be one of the most satisfying winter activities!
From low humidity aiding the drying process to getting your space spruced up for spring, painting indoors during colder months might be the chilly season’s best-kept secret.
Keep reading as we unfold the ins and outs of winter interior painting and share some killer tips to ensure your indoor paint job looks utterly fantastic.
Understanding the Pros and Cons of Winter Indoor Painting
Alright, you’re cozied up at home, watching the snowflake dance outside your window, and you’re hit with a stroke of inspiration to refresh your living space.
Sounds like a plan.
Turning to our interior during the chilly season offers the perfect opportunity to spruce things up with a splash of paint.
But before we slip into our overalls and pop open a fresh can, we should weigh the good against the not-so-good.
From snappy drying times to tricky temperature-related challenges, winter indoor painting can be a hot-cold situation.
Let’s get honest about how those frosty months impact our quest for color, considering both the perks and the quirks of brushing up our walls when there’s a chill in the air.
Exploring the Benefits of Indoor Painting in Winter
When the winter wind is howling, the interior painting costs count, and that goes double for giving those walls a new lease on life. One of the overlooked advantages of rolling on some color during the chilly season is the lower humidity levels – a gift from Mother Nature herself for us keen DIY-ers. This nifty little climate quirk means my living room can flash a new coat without the sticky wait since paint tends to dry faster in drier air, making it prime time for an interior facelift.
Considering the Challenges Faced During Cold Weather Painting
But let’s hit the brakes for a second and chat about the flip side. Sure, interior painting costs are a big part of curing time, but they can also throw a wrench in the work if your space isn’t cozy enough. My buddy learned this the hard way when his paint went thick and clumpy because it was just too darn cold inside; trust me, no one’s lining up for the ‘cottage cheese walls’ look. So, keeping it toasty enough for smooth application without cranking the heat (and your bill) sky-high can be a delicate dance.
How Temperature and Humidity Affect Paint Drying Times
This whole painting gig in winter isn’t just about slapping some color on a wall and calling it a day. Temperature and humidity are like the stage managers of paint drying theater – they can make or break the show. If the air’s as dry as a humorless joke, paint dries quicker, which is excellent, but if your room is chilling like a polar bear’s pad, you might find your paint stubbornly clinging to its wet state a smidge too long for comfort.
Let’s get into the nitty-gritty of beating the winter blues with some indoor paint magic.
I’m about to share some neat little secrets that can turn a potentially frosty painting disaster into a snug success story.
We’re talking about picking a paint that’s not going to get all fussy in the cold, transforming your room into the perfect, painter-ready haven, and getting that airflow just right so you’re not stuck with a stink or, heaven forbid, interior painting costs a damp, draggy drying drama.
It’s the superb guide to cozy makeovers!
Choosing the Right Type of Paint for Colder Conditions
Not all paints are up to the task when the mercury dips, so knowing which could take the cold is key: Look for labels that boast low-temperature application. These mixes are specifically formulated to handle cooler climates and won’t get all finicky, leaving you with a smooth finish like a fresh ice rink, even when Jack Frost is nipping at your nose.
| Type of Paint | Optimal Temperature Range | Application Tips |
|---|---|---|
| Acrylic Latex | 50°F and above | Check manufacturer recs for low-temp variants |
| Oil-Based | 40°F to 90°F | Requires good ventilation, slow drying |
| Alkyd | Around 45°F | Hardy but slower drying in cold, strong odor |
Preparing Your Indoor Space for a Winter Paint Job
So, you’re on board with the idea of turning your home into a winter wonderland with a fresh lick of paint. First things first, you’ve got to prep your space. If you’re anything like me, you know that a stellar paint job is all in the foundation. Ensure the room is warm enough to welcome the new hue – we’re aiming for cozy, not a sauna. Crank up the heat a tad, move the furniture out of the way, and lay down those drop cloths. It’s like setting the stage for a grand performance where your walls are the show’s star. And remember, good lighting is key; you want to see every detail as you go from drab to fab!
Strategies for Effective Ventilation and Heating
Now, about keeping the air in your pad fresh while the radiators are working overtime, achieving the right balance between ventilation and heating is crucial. You don’t want to freeze your toes off, but you also don’t want to inhale paint fumes for hours. The trick is to crack a window or two just enough to keep the air circulating, then let a fan gently guide the less-than-fragrant air. It’s a nifty little juggling act that keeps things toasty while ensuring you’re not woozy when the last wall is done.
- Crack a window to maintain fresh air flow without letting all the warmth escape.
- Utilize fans to direct fumes out and keep the heat distribution even across the room.
- Keep doors open to adjacent spaces to avoid creating stuffy, overheated pockets.
The Best Paint Types for Your Winter Project
Let’s chat about the star players in our winter interior makeover game, shall we?
Choosing the right type of paint is crucial, especially when Jack Frost is having a field day outside.
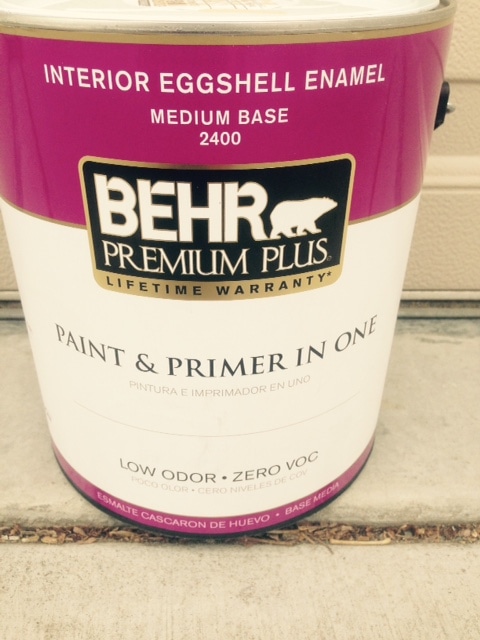
Now, if all those paint options start to make your head spin, here’s a pro tip: look for low-VOC and no-VOC options.
These are like the ninjas of the paint world—rugged, reliable, and they won’t leave that headache-inducing smell lingering in your home.
Plus, water-based paints are fantastic when temps drop; they have the flexibility to deal with the cold’s moody behavior.
Stick around as we dive into why these paints are your golden ticket to a cozy, vibrant home this winter.
Overview of Low-VOC and No-Voc Paints
Let’s shine some light on low-VOC and no-VOC paints—your best buds for indoor winter painting. These types of paint kick out less of those annoying, smelly chemicals we could do without, so you won’t have to worry about airing out the house in sub-zero weather. Plus, they’re kinder to the planet and your health, making them a smart choice for anyone looking to revamp their nest without the nasty fumes.
Why Water-Based Paints Are a Winter-Friendly Choice
Stepping into winter’s chilly embrace doesn’t mean our interior painting projects need to go on ice. Water-based paints are my go-to because they have fantastic freezing point properties, so there’s less risk they’ll turn into a popsicle if the thermostat dips too low. They stay workable, and since they’re kinder to the environment and our lungs, it’s a cozy win-win for my wintertime refresh.
Maximizing Ventilation While Keeping the Cold Out
So, we’ve picked our poison—err, I mean paint—and our room’s all prepped for its winter glow-up.
But hold up, now comes the tricky part of winter painting.
How do we juggle keeping fresh air rolling in without turning our cozy home into a walk-in freezer?
Excellent ventilation is essential, but so is not freezing your toes off, which brings us to the fine art of crafting circulation without the chill.
It’s all about that balance, you know?
I’m going to dive right in and break down the ins and outs of using fans and air purifiers to maintain good air quality. I’ll also discuss smart ways to keep the rest of your living space snug and warm while your walls are getting the star treatment.
Utilizing Fans and Air Purifiers for Effective Air Circulation
So, here I am with brushes in hand and a room set for a makeover, but there’s a catch: winter’s chilly breath is knocking on my window. Navigating this is all about strategy — I pull out my trusty fans and maybe even an air purifier. They’re like my backstage crew, silently whisking away fumes and keeping the air crisp, like a perfectly orchestrated air ballet that doesn’t drop the curtain on my toasty, warm indoor vibe.
- Setup fans to gently push paint odors toward a cracked window, allowing a draft that doesn’t invite Jack Frost over.
- Place an air purifier in the room to capture lingering chemicals, ensuring I’m not trading fresh walls for stuffy air.
- Arrange the furniture and drop cloths to create a clear airflow path, avoiding paint-scented dead zones.
Sealing Off Painting Areas From the Rest of the Home
Creating a bit of separation between my living room-turned-art studio and the rest of my cozy retreat is crucial. Clever use of plastic sheeting or even old blankets can serve as a makeshift barrier, keeping those jackhammering chills at bay while trapping in the warmth where I work. Plus, it makes clean-up a breeze because, let’s face it, no one wants to dust snow inside the house, and I don’t need paint specks in my spaghetti!
Scheduling Your Painting Project for Success
So there I am, a mug of cocoa in hand, ready to transform my sanctuary with a lick of paint, but the numerals on the thermostat give me the side-eye.
Winter has its perks, but when it comes to indoor painting, timing isn’t just a nice-to-have; it’s everything.
Trust me, there’s a sweet spot in those frosty days that can turn your project from a shiver-fest into a snuggly success.
Let’s weave through the frosty early mornings and the dark, nipping evenings to pin down that perfect warm and bright slot for rolling on some warmth.
And while we’re at it, we’ll noodle over how to stretch that project timeline to fit like a glove with old man winter’s icy schedule.
Understanding the Ideal Times of Day for Indoor Painting in Winter
Call me a time detective because when it comes to indoor winter painting, I’ve paid out just when to dip those brushes. Painting in the late morning to early afternoon grants you the sweet embrace of natural light and the mildest temperatures of the day, ensuring that the paint behaves just as you’d expect without any cold-induced surprises. Plus, it gives your walls ample time to start drying before the evening chill sets in, making it the cozy sweater equivalent for your indoor paint affair.
How to Plan Your Project Timeline With Colder Weather in Mind
Let me tell you, winter throws a curveball at your standard painting calendar. When I’m gearing up for an indoor paint job during these cooler months, I slide those tasks in the sunlight hours when the warmth peeks in, and the frost seems like a distant memory. It’s all about aligning with that cozy indoor climate and the natural rhythm of shorter days and longer nights—think of it as dancing to winter’s tempo, making sure each brushstroke lands at the right tempo without rushing against Mother Nature’s chilly playlist.
Expert Techniques for a Flawless Winter Paint Job
So, we’ve bundled up, our breaths are fogging up the window, and we’re itching to add a stroke of genius to our walls amid the chilly season.
But let’s not kid ourselves; painting when the thermostat’s low is a different ballgame.
Fear not, my fellow winter warriors. I’ve got some insider techniques lined up that’ll ensure you nail that winter indoor paint job without sweat—or, should I say, no frostbite?
We’ll follow a step-by-step guide for applying paint when it’s nippy out, and I’ll share some clever tricks to avoid those pesky drying issues that can wreak havoc on your handiwork.
Grab your brush and beanie, and let’s get that paint rolling flawlessly even as the mercury dives.
Step-by-Step Guide for Applying Paint in Colder Temperatures
So, you’re all set to roll up your sleeves, and the temperature is not cooperating. But don’t let that stop you: to paint indoors when it’s looking more like a winter wonderland outside, start by warming up the room to a snug temperature—that’s usually between 60°F and 70°F. While keeping those digits steady, stir your paint thoroughly to get a smooth consistency, then pop those rollers and brushes into the mix, applying even coats and allowing ample drying time before adding a new layer; watch as your frosty abode transforms with each stroke!
| Preparing for Paint Application | Drying Time Management | Temperature & Humidity Control |
|---|---|---|
| Heat room to 60°F – 70°F | Extend drying times as needed | Monitor with thermostat/hygrometer |
| Stir paint for even consistency | Factor in reduced daylight hours | Keep warmth in, moisture out |
| Apply with smooth, even strokes | Use space heaters judiciously | Utilize fans for air circulation |
Tricks for Ensuring Even Drying and Avoiding Paint Failure
One trick I’ve picked to keep my winter painting projects on point is the trusty old two-heater tango. I pop one space heater close to the wall I’m working on to encourage the paint to dry uniformly and another at the opposite side of the room; this way, I stir up a gentle, warm draft that wraps around the entire space evenly. It’s like a soft hug for your fresh paint, preventing those annoying wet patches and ensuring the finish comes out like a dream, even when the weather outside is more suited for polar bears than painters.
Painting your home’s interior in winter can be intelligent thanks to lower humidity that speeds up drying times. Still, proper room temperature and paint selection are critical to avoiding issues.
Ventilation is also crucial, as it allows for fume removal without losing all your toasty warm air.
Timing your painting projects during the warmest parts of the day maximizes natural light usage and ensures better drying conditions.
So yes, with the proper preparation and techniques, painting indoors during the cold months can lead to a cozy and successful winter home makeover.
